 Sereno Routing guide
1. Quick start: just route it
From signing in to a PDF of your route. Nothing here needs the planner, watches or screening.
This page uses the web edition, which runs in any browser on a computer, tablet or phone. The Android app works the same way and is covered at the end of this page.
Sign in
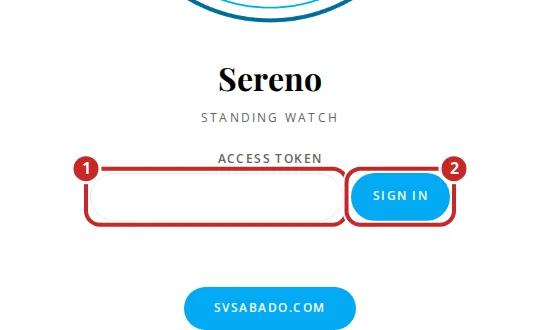
- Open https://sereno.svsabado.com.
- Paste the token Ray gave you into Access token and tap Sign in.
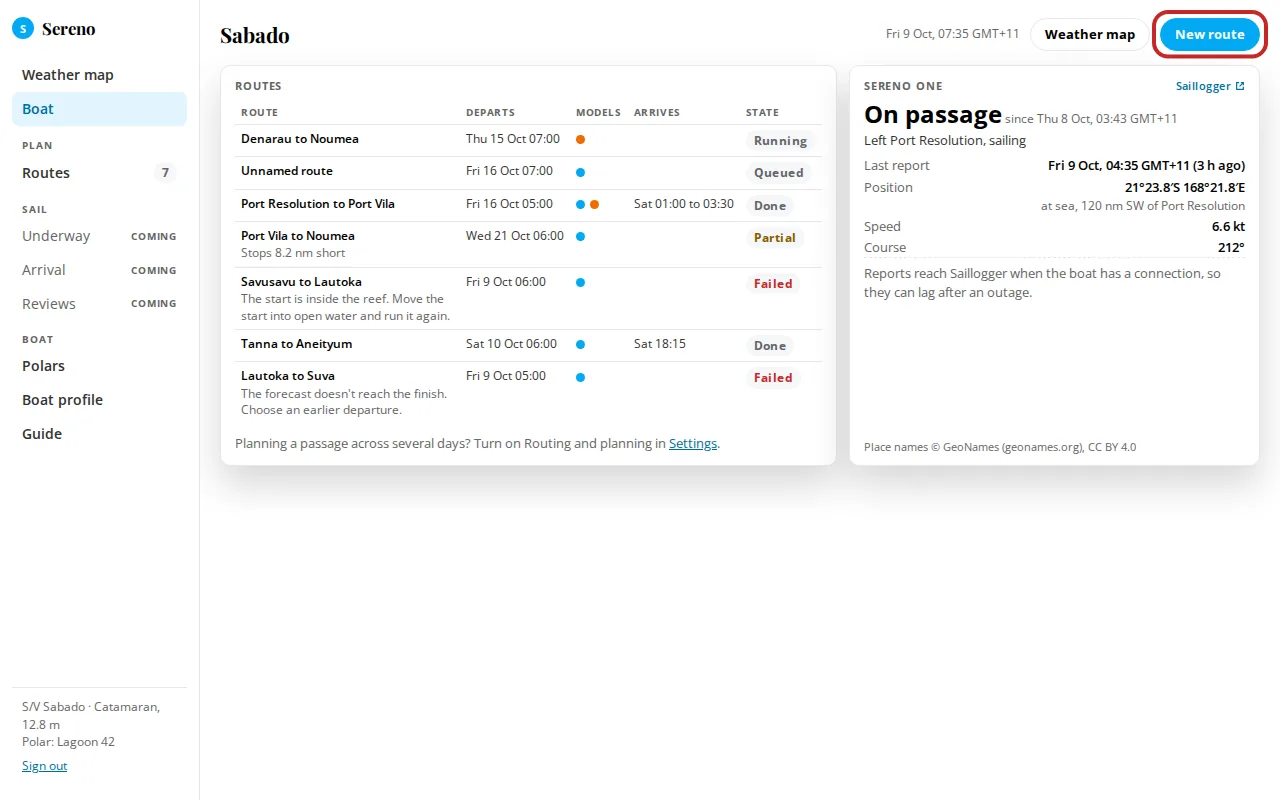
You land on the Boat page. Tap New route at the top right.
Place the start and finish
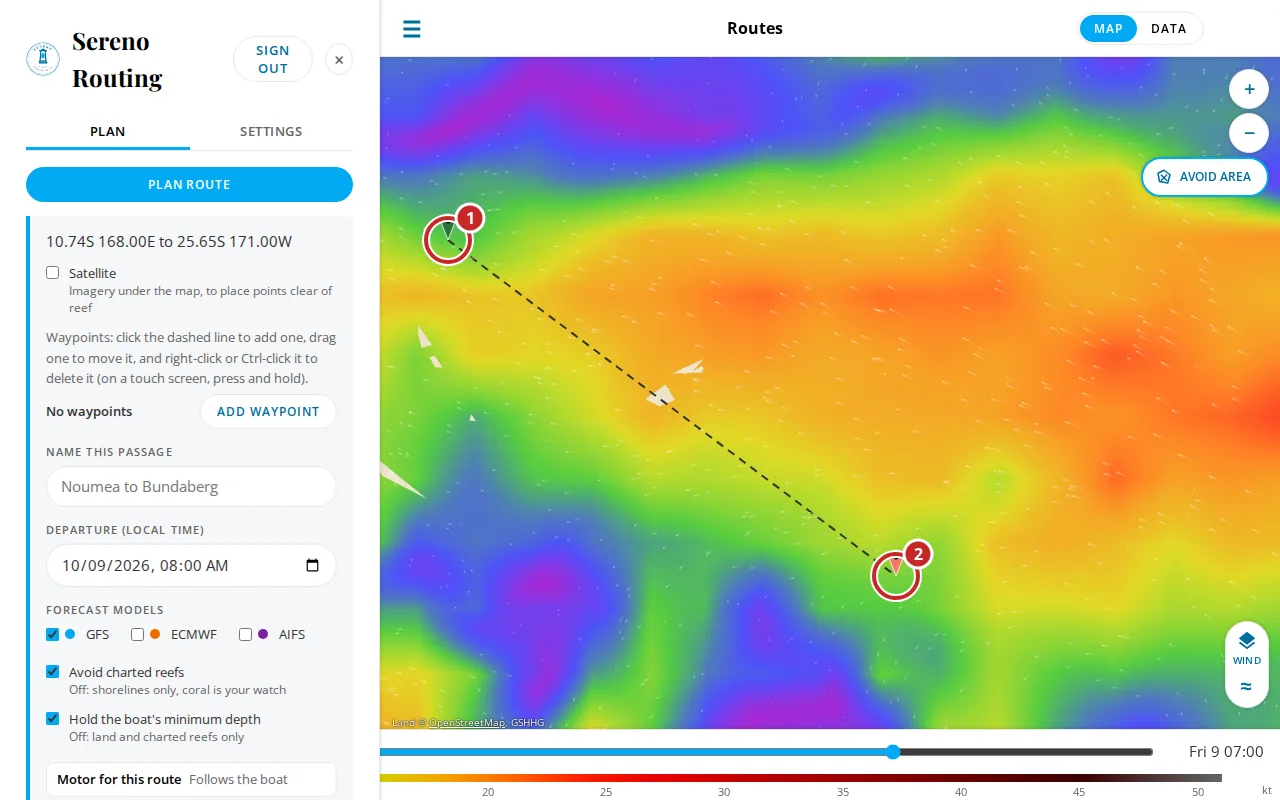
The map opens with the button at the top of the side panel reading Click start, then finish… (on a touch screen, tap rather than click).
- Click the map where the passage starts. A green pin drops there.
- Click where it finishes. A red pin drops there, with a dashed line between them.
Zoom with the + and − buttons, the mouse wheel or two fingers. You can drag either pin afterward. Keep both ends in open water, outside any reef; the router plans to the water outside a pass, not into a lagoon.
Fill in the form and run it
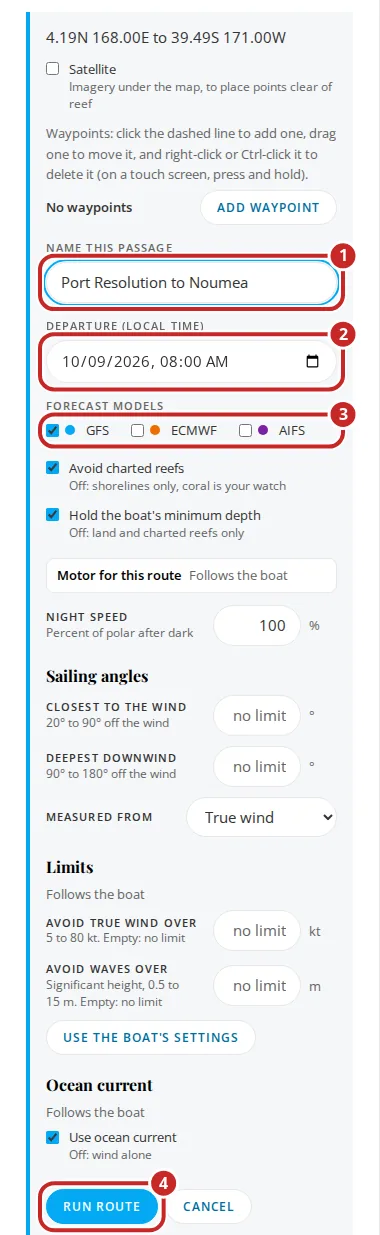
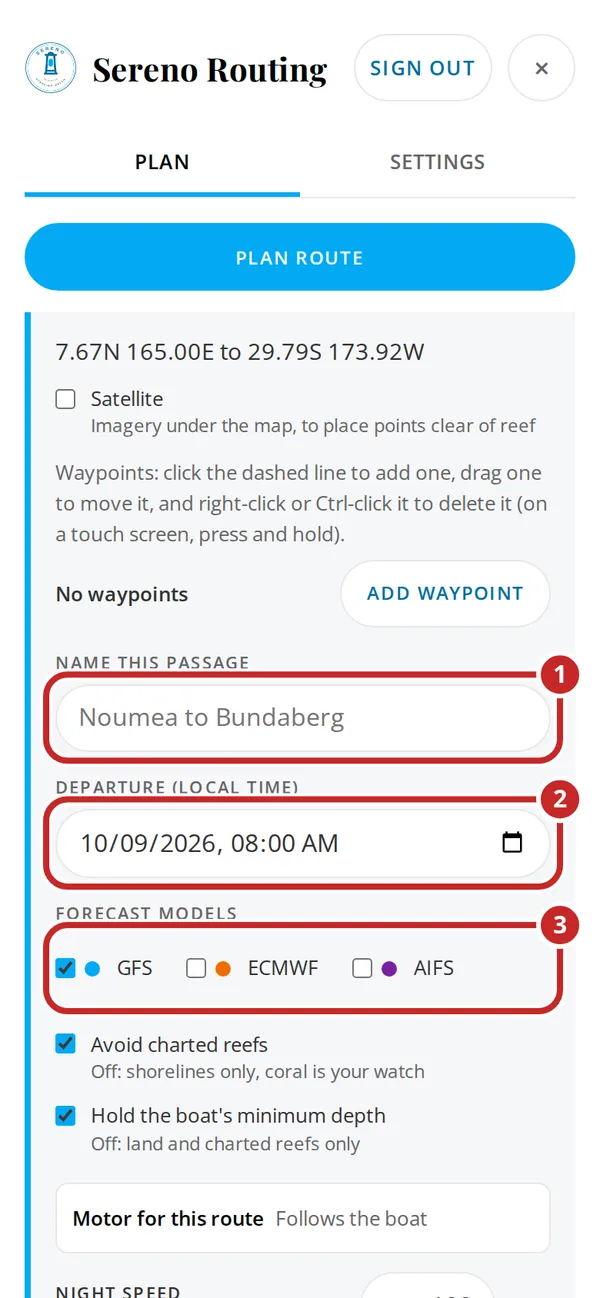
- Name this passage: optional, but it makes the routes list easier to read.
- Departure (local time): when you plan to leave, in your device's time zone. It starts at the next whole hour.
- Forecast models: GFS is ticked. Tick ECMWF as well, and AIFS if you like. Each model gets its own route, drawn on the same map, so you can see where they agree.
- Scroll down and tap Run route.
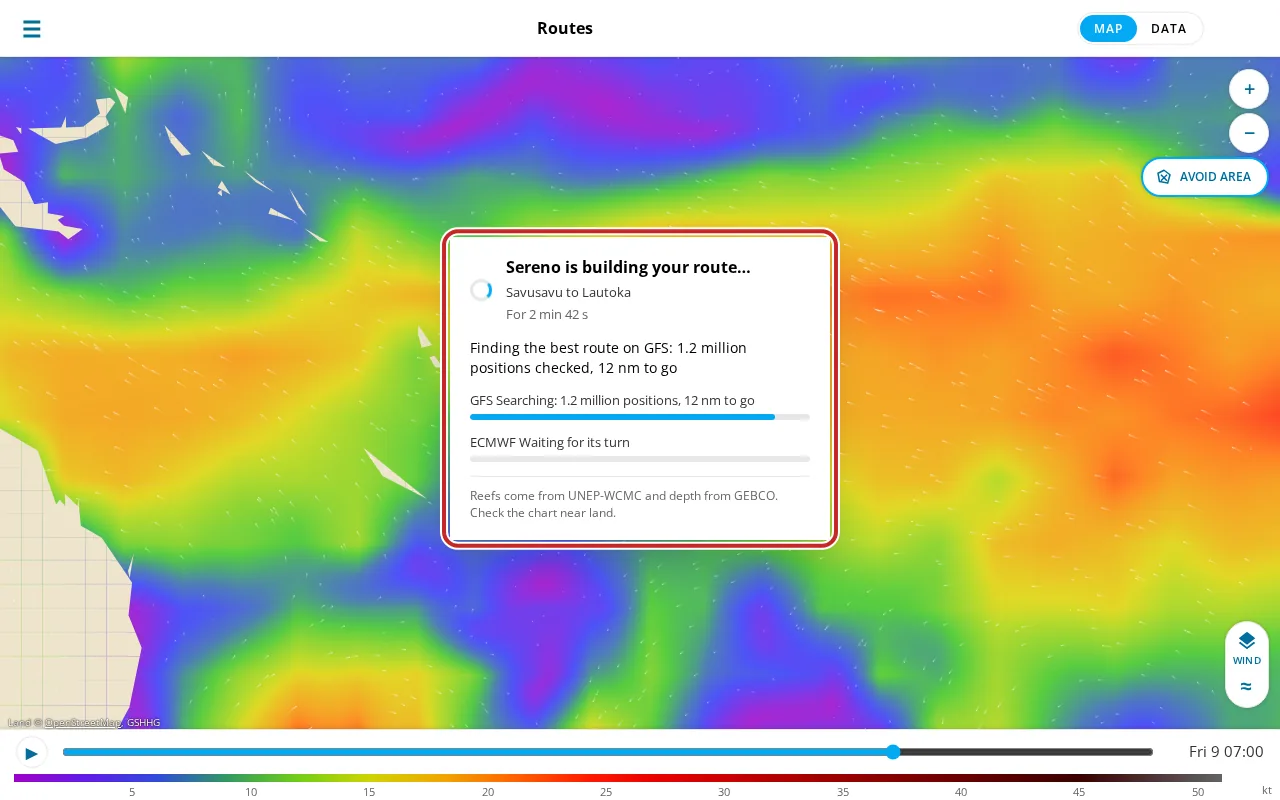
A box over the map shows how the route is coming along: reading the weather, working out the coastline and reef along the way, then searching each model in turn. It can take a few minutes, longer for a long passage or for several models. A long passage is planned in parts, and the box says which one it's on, such as Part 2 of about 4, then Last part. The total is an estimate from the distance left, so it can change as the route goes. You can close the box or leave the page; the route keeps running.
Read the result
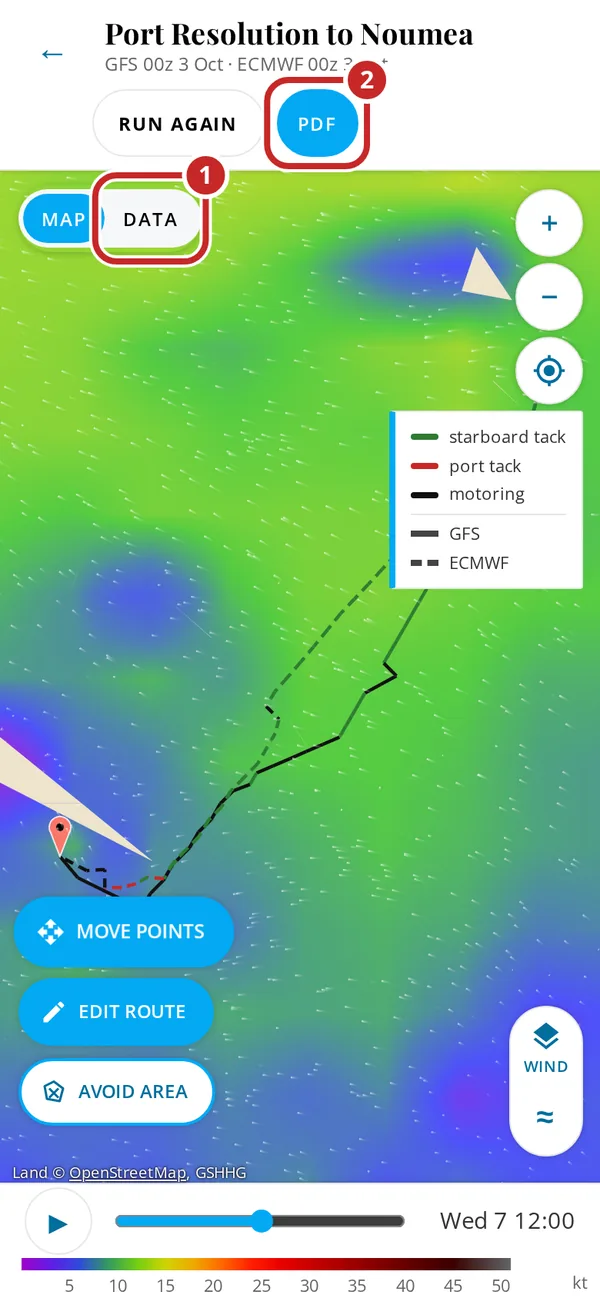
When it's done, the route opens on the map. The line's color shows the sail: green on starboard tack, red on port tack, black under motor. Each model has its own line style: GFS solid, ECMWF dashed, AIFS dotted. Drag the slider at the foot of the map, or tap play, to move the boats along their routes in time with the weather.
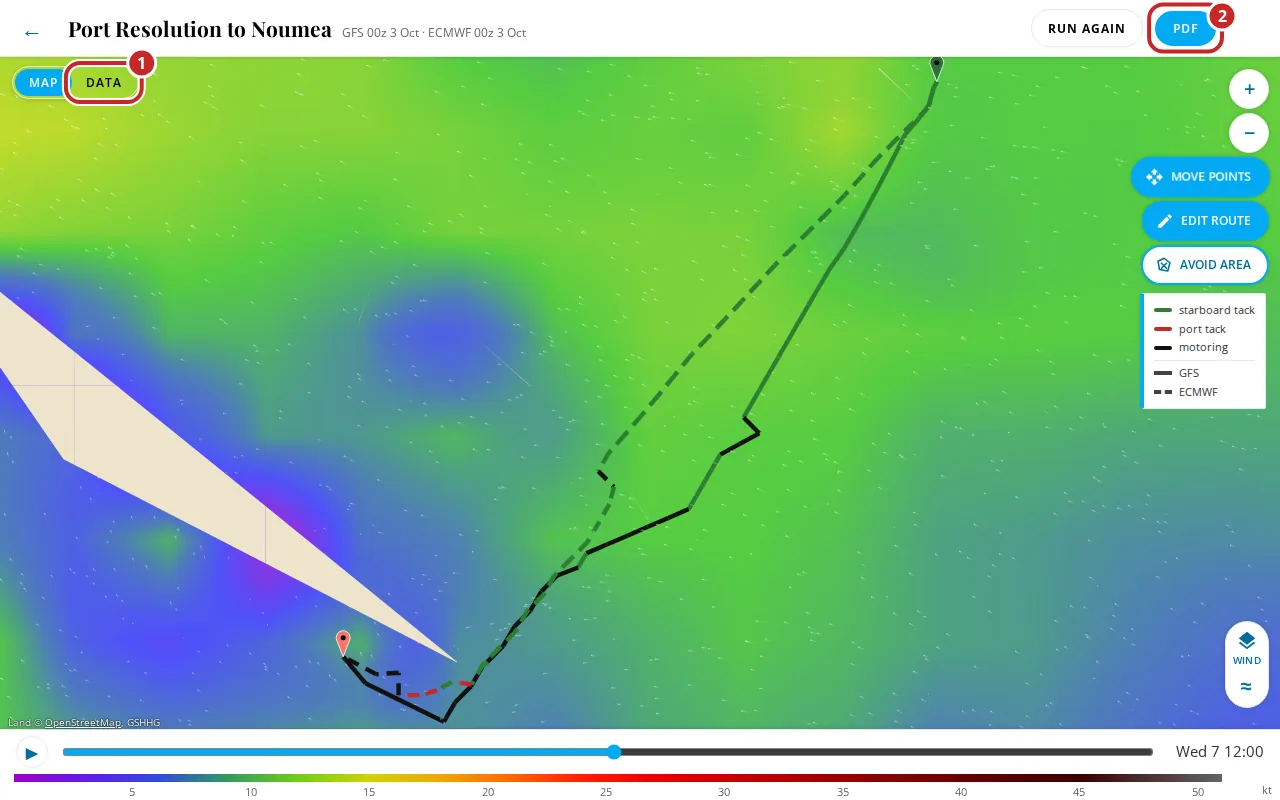
Tap Data for the numbers. Summary compares the models side by side: when you arrive, how far, how long under motor, the strongest wind, tacks and gybes, and the worst comfort. Route lists every leg. Reading a route covers each tab.
Get the PDF
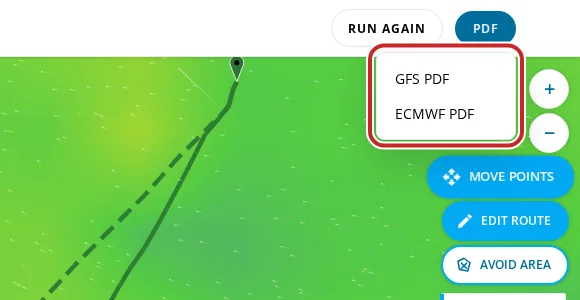
Tap PDF in the bar and choose the model. The router builds the report (the chart, the passage, the conditions and every leg) and your browser downloads it.
On a phone's browser
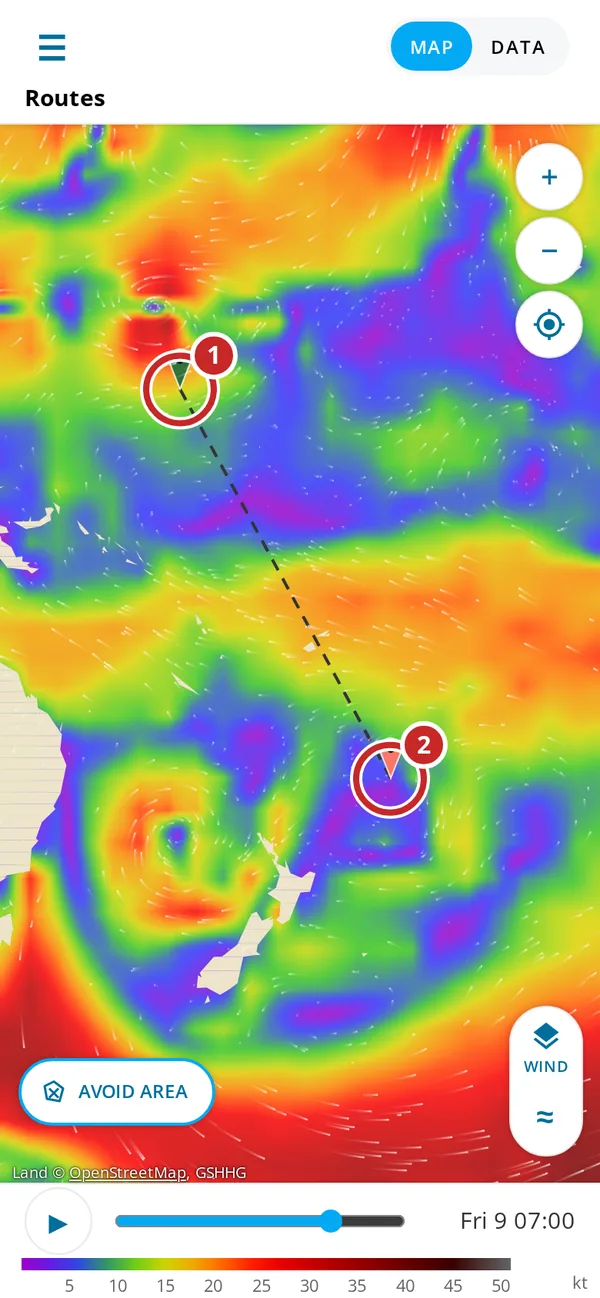
The same steps work on a phone. The routes list slides over the map: tap Plan route, close the list with × to see the map, and tap the start and the finish. The form slides back over the map as soon as the finish is placed.
On the Android app
Install it first (see The Android app). Then:
- On the Weather screen, tap New route.
- Tap the map for the start, then again for the finish. The hint line reads Tap the start, then Tap the finish.
- Tap Options to name the route, set Departs (local time) and choose Models (GFS and ECMWF are on).
- Tap Route. The route screen opens and shows its progress.
- When it's done, switch Map to Data, then open the Export tab and tap Download GFS PDF (one button per model).
Android, New route: the map with a start and finish pin, the hint line reading "Start and finish set. Drag either to move it.", the Clear and Options buttons, and the Route button at the foot.